If you enjoy automating tasks, scraping data, or customizing how websites behave—and have some basic JavaScript knowledge — the Refresh and run script feature in Auto Refresh Page is perfect for you. This powerful tool lets you run your own JavaScript code on Auto Refresh Page events, giving you complete control over your browsing experience.
Enabling User Scripts (Chrome 138 and above)
⚠️ If your Chrome version is below 138, please update your browser by opening a new tab and entering chrome://settings/help
Steps to enable User Scripts:
- Go to the Extensions page:
chrome://extensions(copy this address and paste in a new tab) - Find the Auto Refresh Page extension and click Details on its card
- Enable the Allow User Scripts toggle

ℹ️ If the toggle is not enabled, the chrome.userScripts API will be unavailable until the extension’s context is reloaded (for example, after restarting the service worker).
Auto Refresh Page isn’t just about refreshing web pages — it’s a powerful tool that allows you to execute custom JavaScript code after each page refresh or at each countdown interval. This feature opens up a world of possibilities, letting you automate tasks, modify page content, or trigger specific actions. In this guide, we’ll show you how to run custom JavaScript code with Auto Refresh Page and explore some practical examples.
How to Execute Custom Scripts After a Refresh
Follow these steps to execute your own JavaScript after a page refresh:
Follow these steps to execute your own JavaScript after a page refresh:
- Install Auto Refresh Page. Make sure you have Auto Refresh Page installed in your browser (Chrome, Edge, Opera, Yandex.Browser).
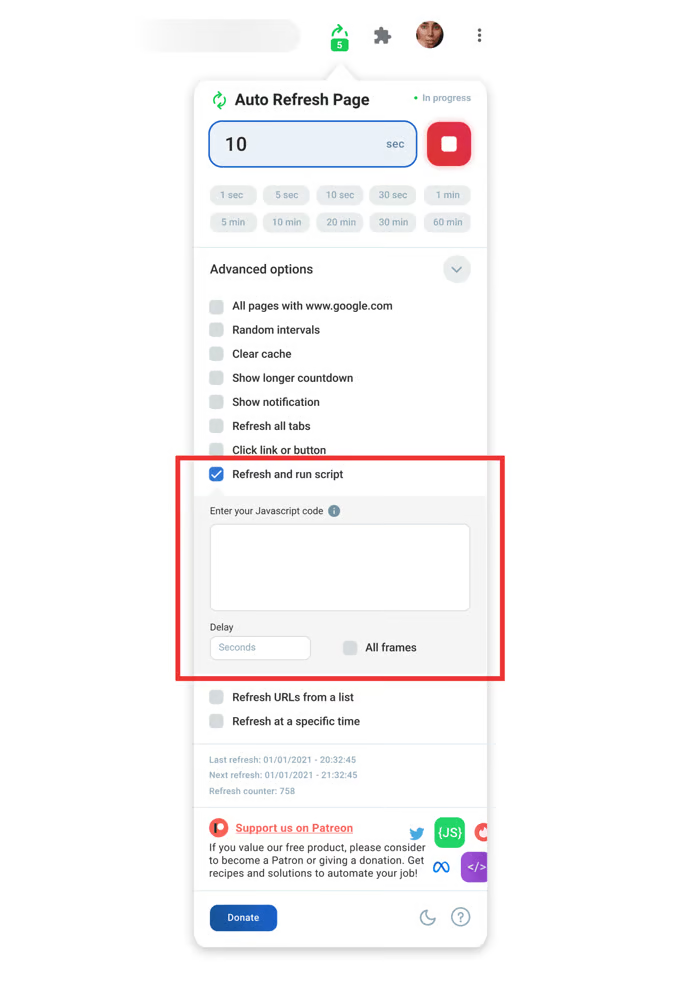
- Access Advanced Options. Open Auto Refresh Page and click on the Advanced options.
- Enable “Refresh and Run script”. Checkmark the Refresh and run code option.
- Enter Your JavaScript Code. In the textbox area, enter your JavaScript code. Here’s an example:
document.querySelector('body'); setTimeout(() => { alert('Hello!') }, 1000); - Enable “All Frames” (Optional). If you want to run the code on all internal documents, check the All frames option.
- Start the Refresh. Click the Start button to begin the countdown and trigger the refresh along with the script execution.

What You Can Do with Custom Scripts
The Custom Scripts feature lets you automate a wide variety of actions on any webpage. Here are some examples of what you can achieve:
- Execute JavaScript at the Start of a Page Refresh: Perform custom actions immediately when the page begins to refresh.
- Execute JavaScript at the End of a Page Refresh: Run specific tasks once the page has fully reloaded.
- Trigger Scripts When a Keyword Appears: Automatically execute code when certain keywords show up on the page.
- Trigger Scripts When a Keyword Disappears: Run actions when specific keywords are no longer present.
- Automate Multiple Clicks: Create scripts that perform multiple clicks on targeted elements automatically.
These are just a few examples—the possibilities for automation and customization are nearly limitless, constrained only by your creativity and JavaScript skills.
Example Scripts
Here are some examples of what you can do with custom JavaScript code in Auto Refresh Page.
💡 You can also use AI tools like ChatGPT, Grok, or Gemini to generate custom scripts tailored for your specific needs and functionality in Auto Refresh Page.
Hello World Alert
This script will display an alert with “Hello!” after each refresh:
setTimeout(() => { alert('Hello!') }, 1000);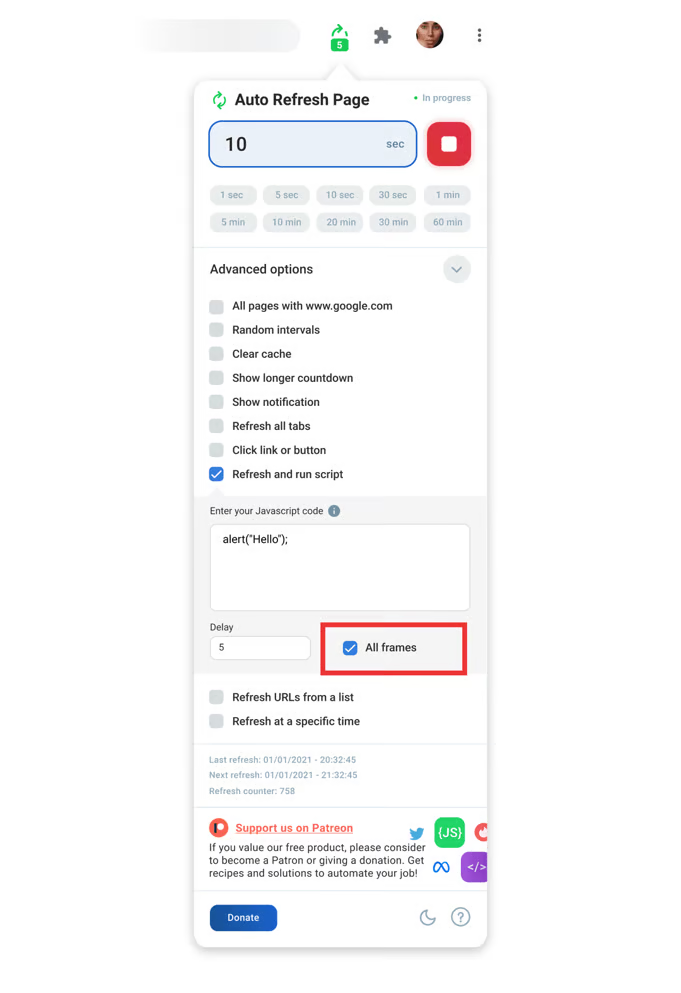
Changing the Page Background Color
This script changes the page’s background color to a random color after each refresh:
function getRandomColor() {
    var letters = '0123456789ABCDEF';
    var color = '#';
    for (var i = 0; i < 6; i++) {
        color += letters[Math.floor(Math.random() * 16)];
    }
    return color;
}
document.querySelector('body').style.background = getRandomColor();
What You Can Do with Custom JavaScript
The possibilities with custom JavaScript are vast! Here are some ideas on how you can use this feature:
-
- Automate interactions: Automatically click buttons or other elements on a page.
-
- Perform searches: Automatically search for specific information on a page.
-
- Toggle functionality: Enable or disable specific features on the page.
-
- Control page scrolling: Scroll the page from top to bottom (or vice versa).
-
- Modify page styles: Change CSS styles to customize the appearance.
-
- Auto-register and submit forms: Automatically fill out and submit forms without manual input.
-
- Bypass bot protection: Bypass certain security measures like Google’s robot verification.
-
- Parse page data: Extract and process data from the page content.
Conclusion
With the ability to execute custom JavaScript on each refresh, Auto Refresh Page becomes an incredibly versatile tool. Whether you want to automate tasks, manipulate content, or create complex interactions on the page, the only limit is your imagination!